Pre-event checklist
Introduction
In the lead up to Event Day, there are a few essential checks that can help ensure everything runs smoothly on the day. This guide walks you through the key areas you should review in advance, from confirming your ticket sale end date and checking ticket volume limits to testing your scanning setup and making sure you have reliable internet and power.
By following these steps, you can avoid last-minute issues, prevent overselling, ensure guests can check in without delays, and feel confident that your ticketing setup is fully event-ready.
Summary
In this article, we’ll cover:
- How to check and adjust your event and sale end date/times depending on whether you want to continue selling tickets online during the event.
- Where to review ticket volume limits at event, category, and ticket type level.
- How to complete a test scan and review your guest list before event day.
- What to confirm regarding internet access and power, including tips for backup options.
Help Guide
How to Check and Update Your EVENT Start and End dates & times.
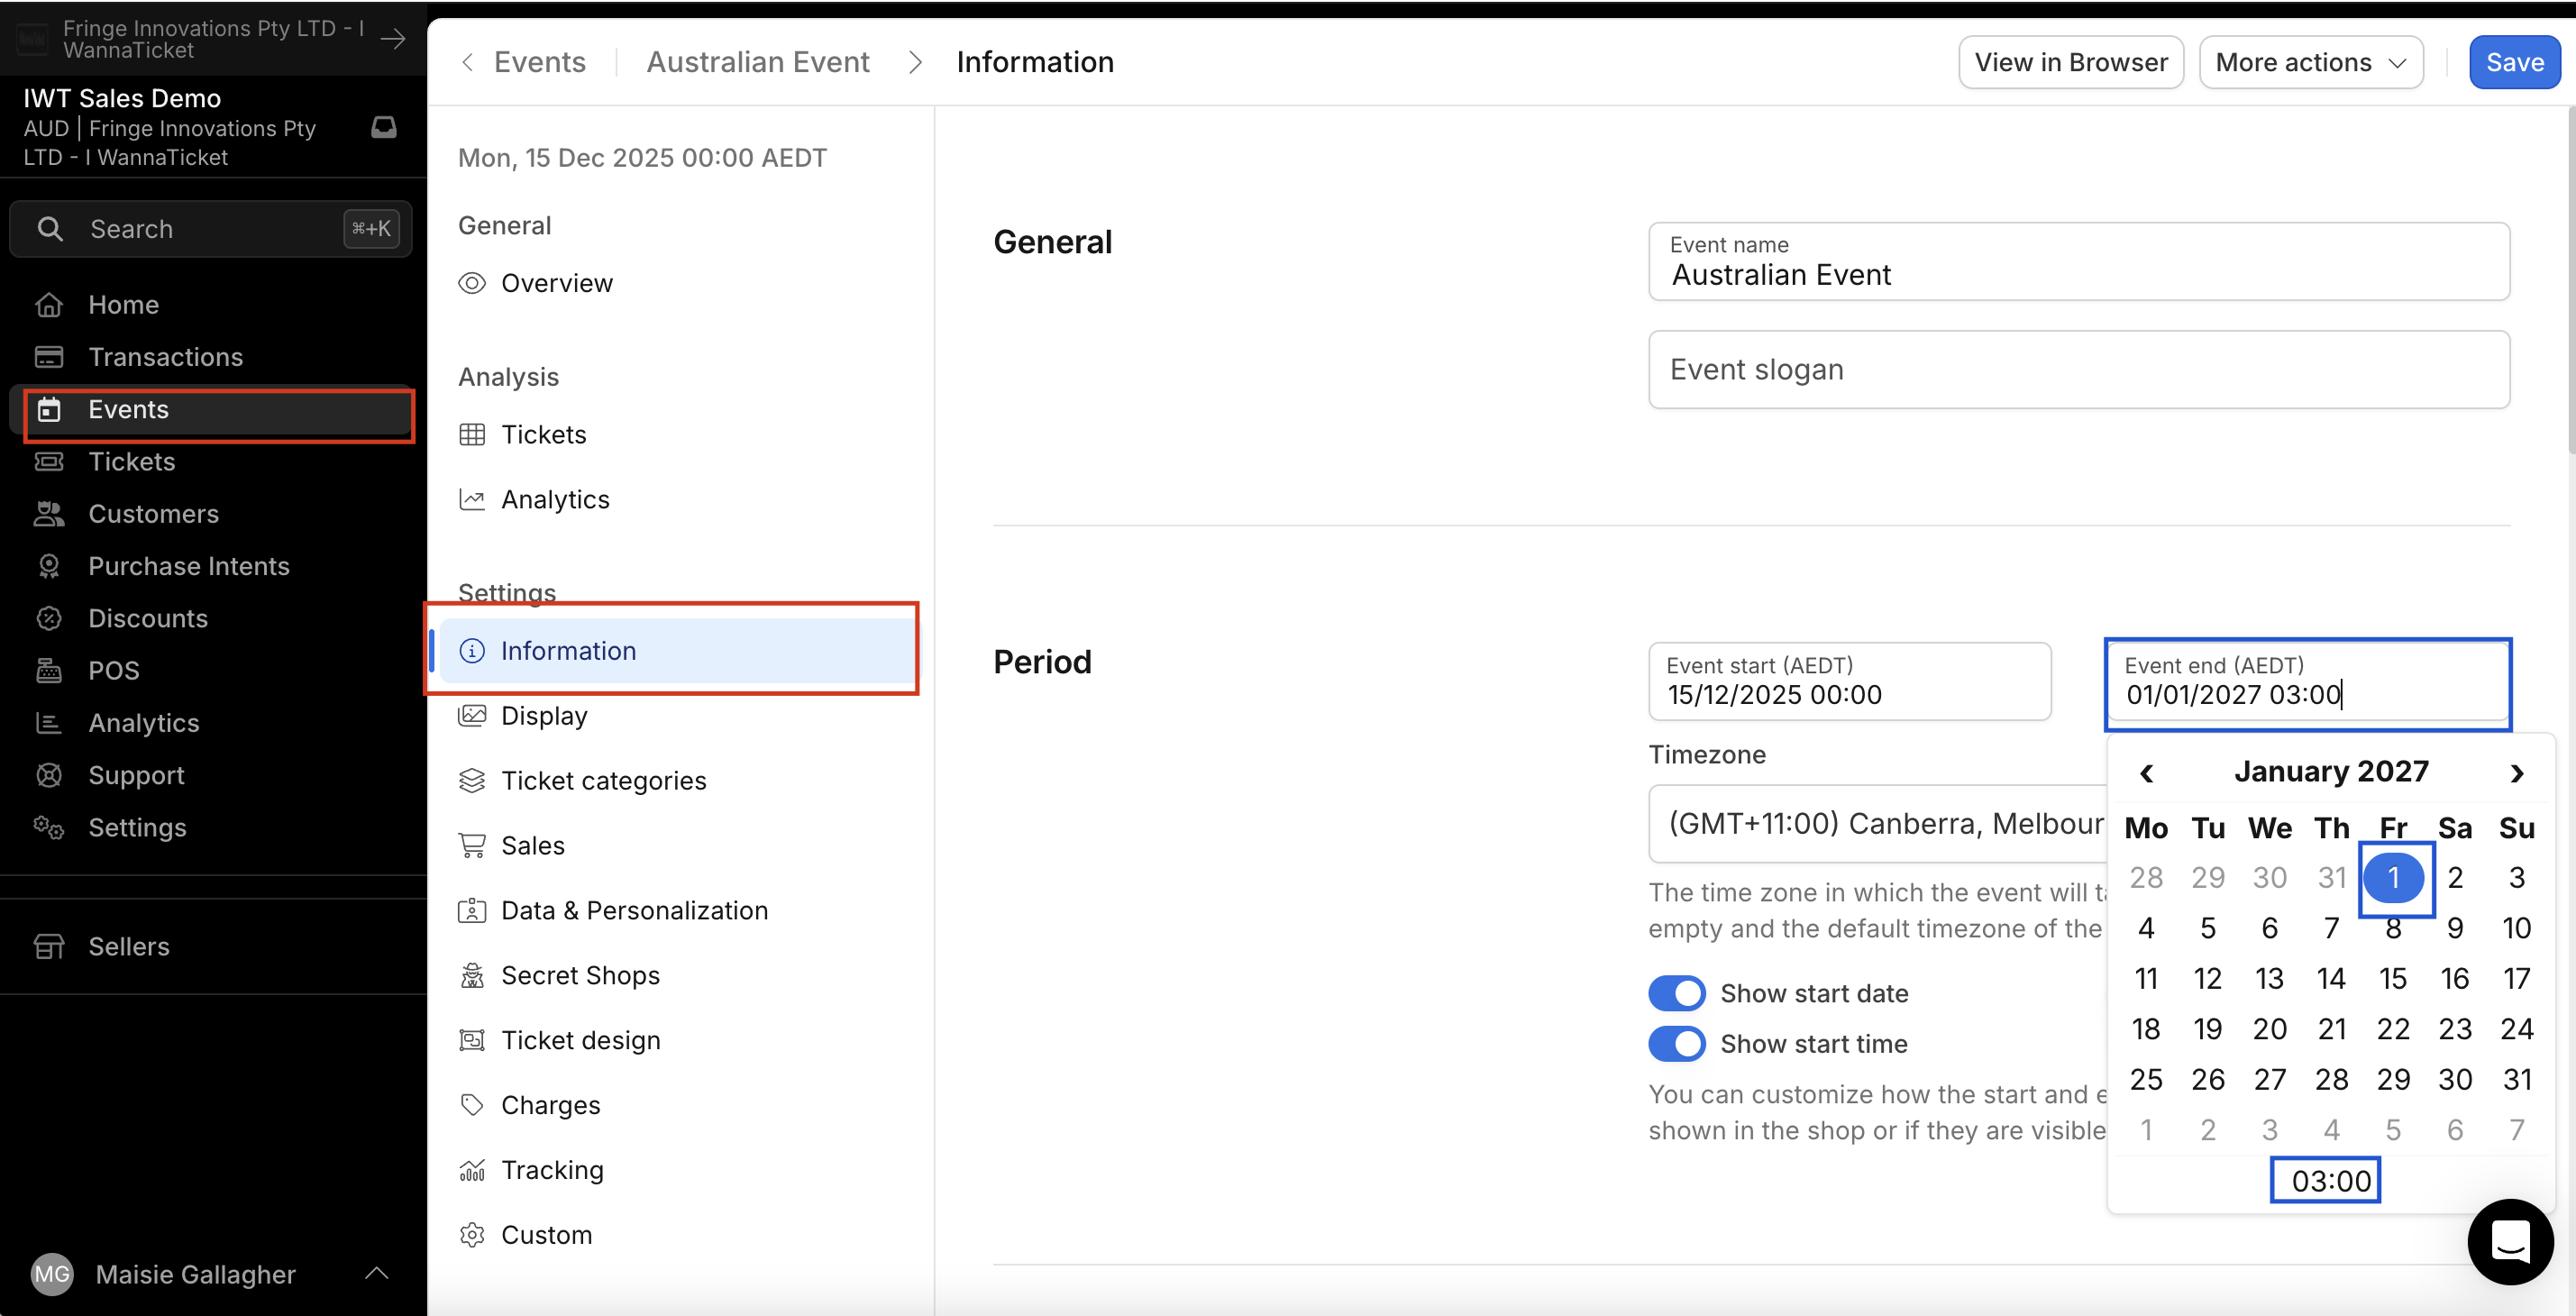
- From the Account Menu, select the Event tab and open your event.
- In the Event Menu, click Information
- Under the heading Period you can view the current date and time your event is set to end.
This will display the exact date and time your EVENT is scheduled to finish.
How to Check and Update Your SALES Start and End dates & times.
The end time for ticket sales can be set earlier than the event end time. This is useful if you want ticket sales to close before the event finishes.
For example, you may wish to stop online sales once the event has started, or close ticket sales at a specific time prior to the event.
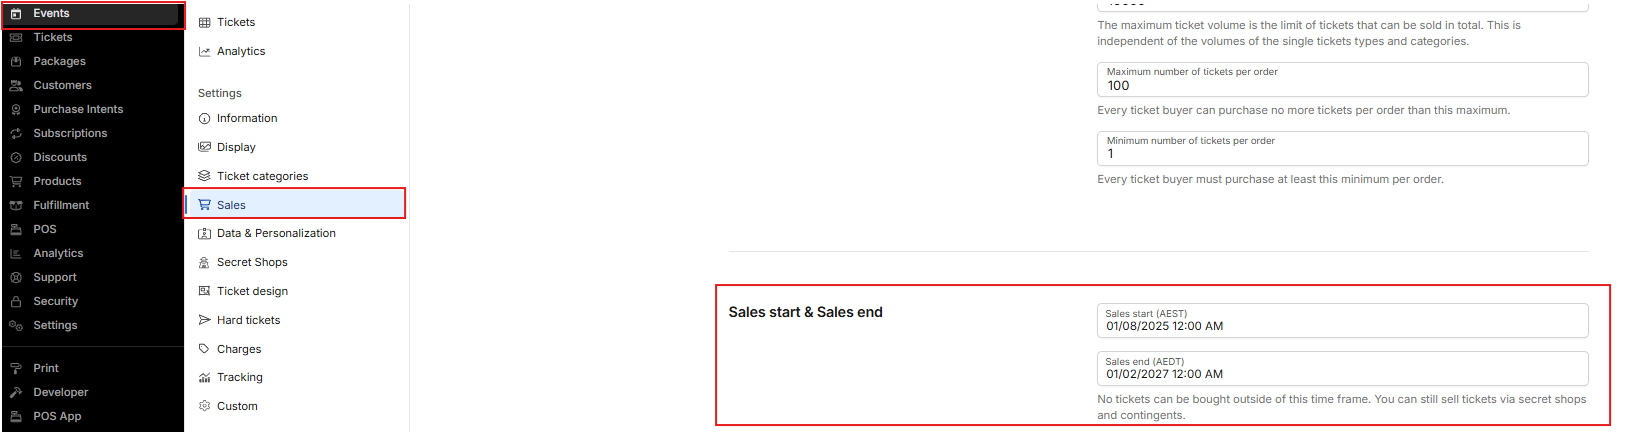
- From the Account Menu, select the Event tab and open your event.
- In the Event Menu, click Sales
- Via the heading Sales Start & Sales end you can view the current date and time your ticket sales are set to end.
Important
- If you would like customers to continue purchasing tickets online after the event has started, the Sale End Date must be set to a time after the event start time.
- If you would like online ticket sales to close before or at a specific time, you will need to set the Sale End Date accordingly.
Please ensure this date and time are configured correctly to avoid online sales closing earlier or later than intended.
Checking Ticket Volume
How to Check Ticket Volumes
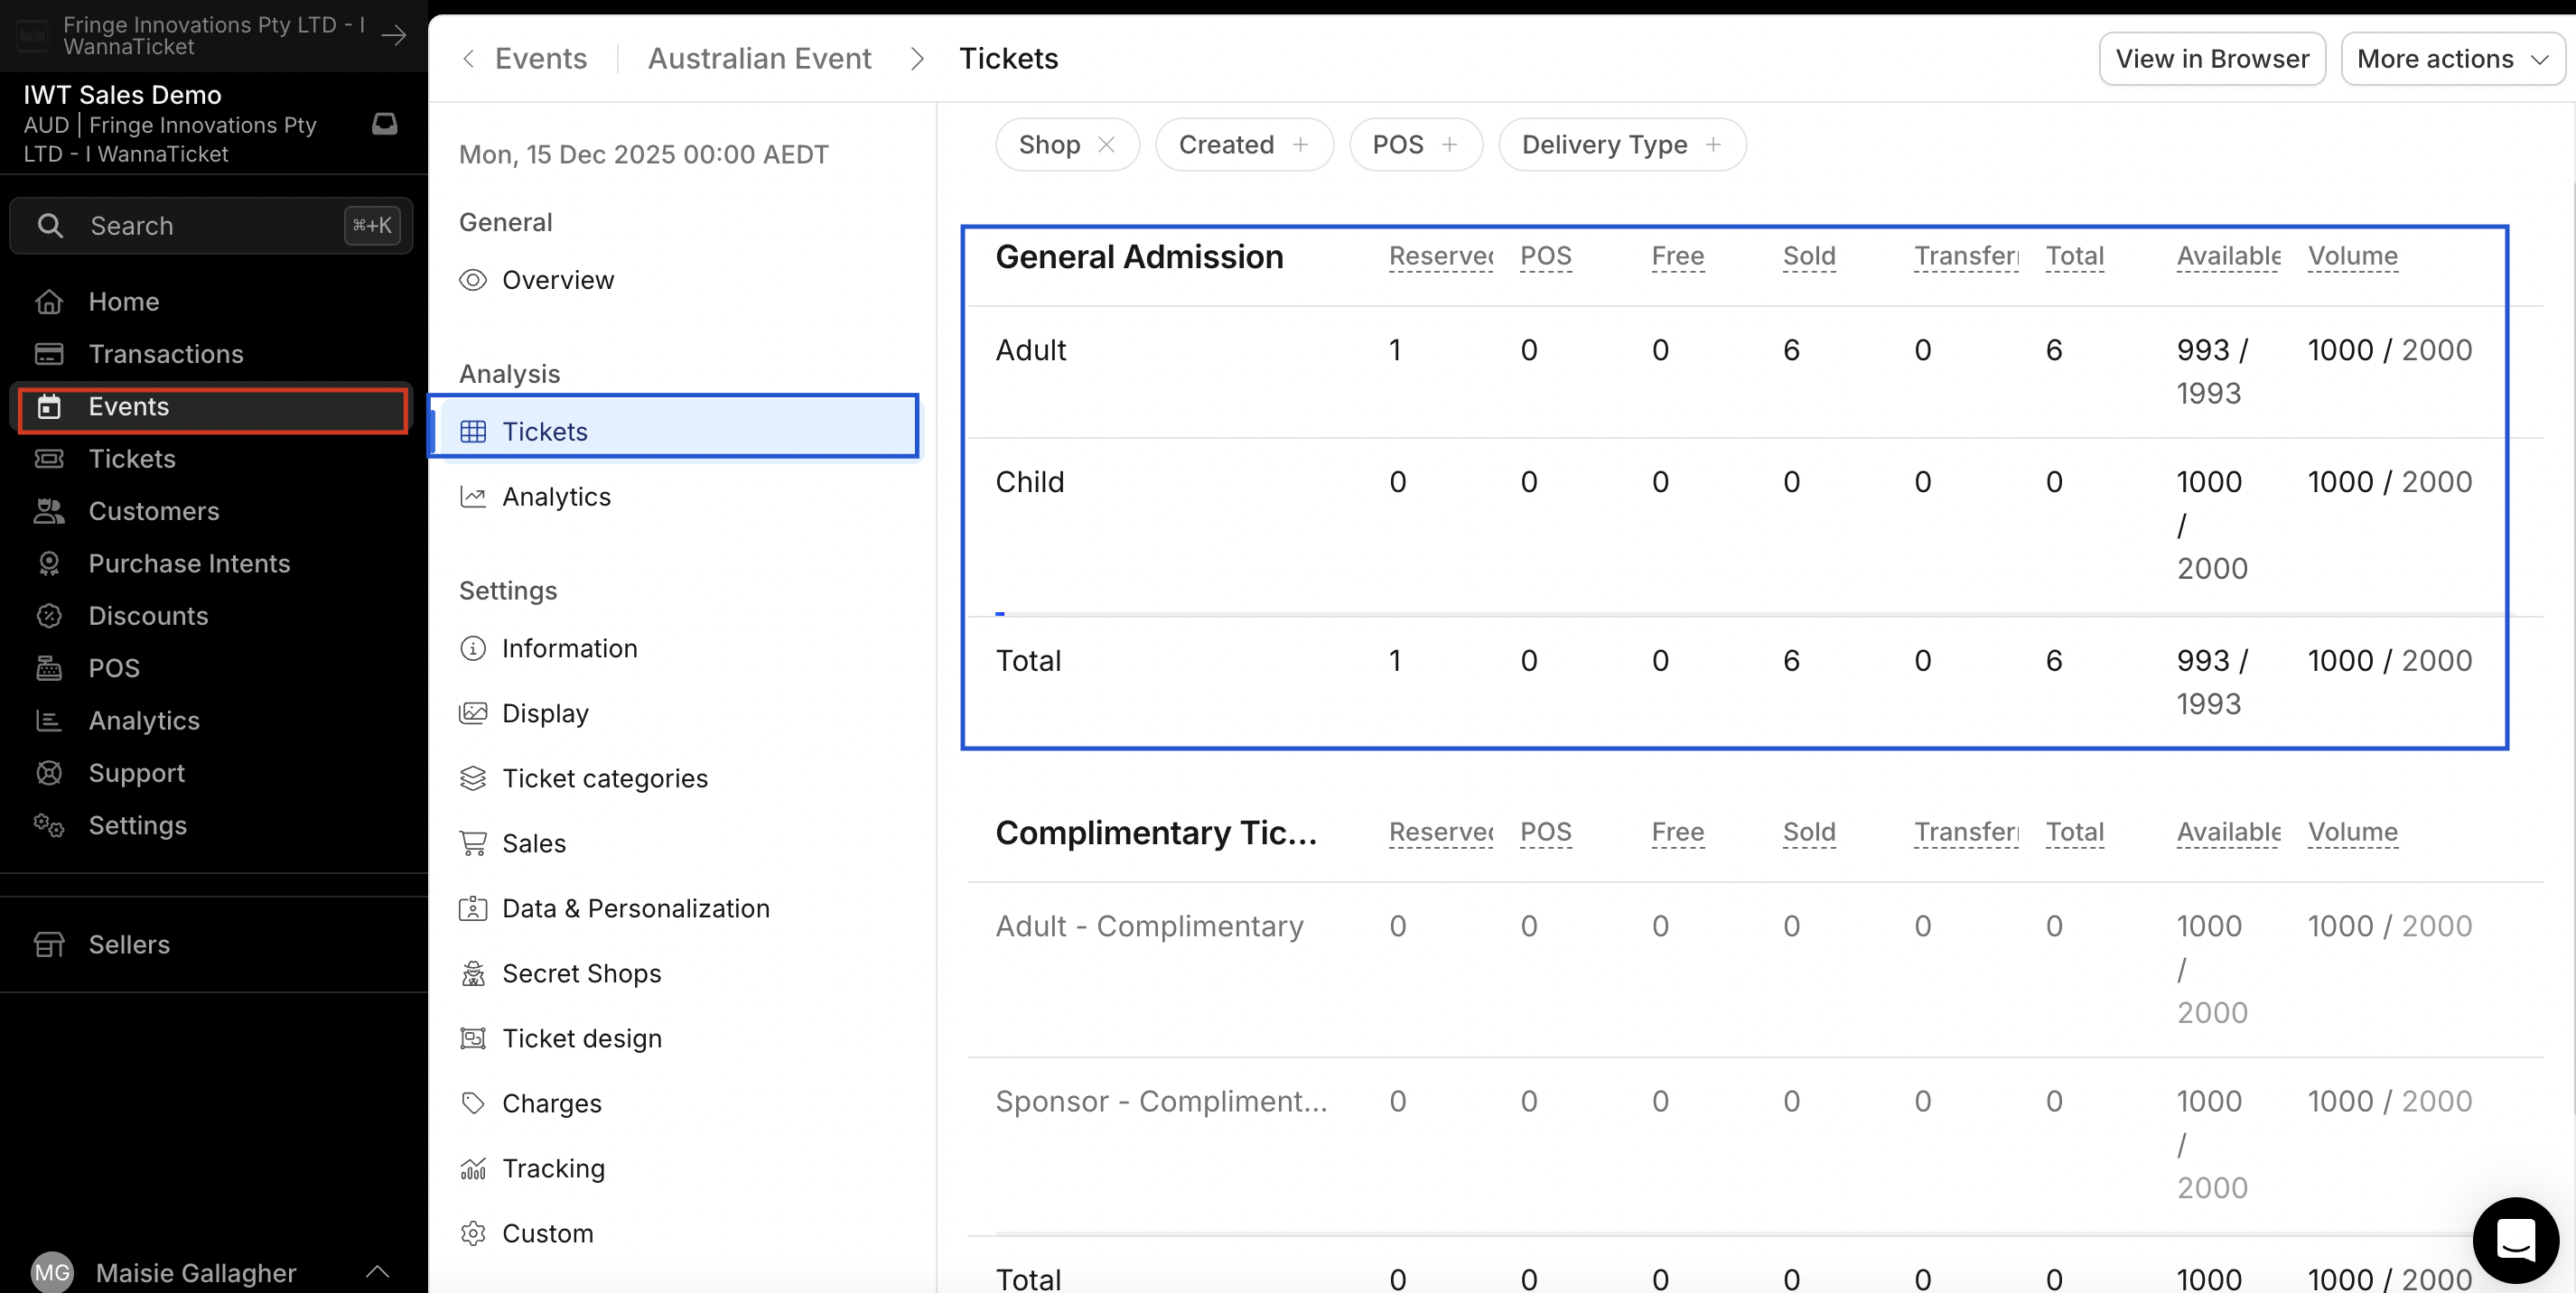
- From the Account Menu, click Events and select your event.
- In the Events Menu, click on the Tickets tab.
This page provides an overview of your event’s ticket performance and ticket volumes.
Important
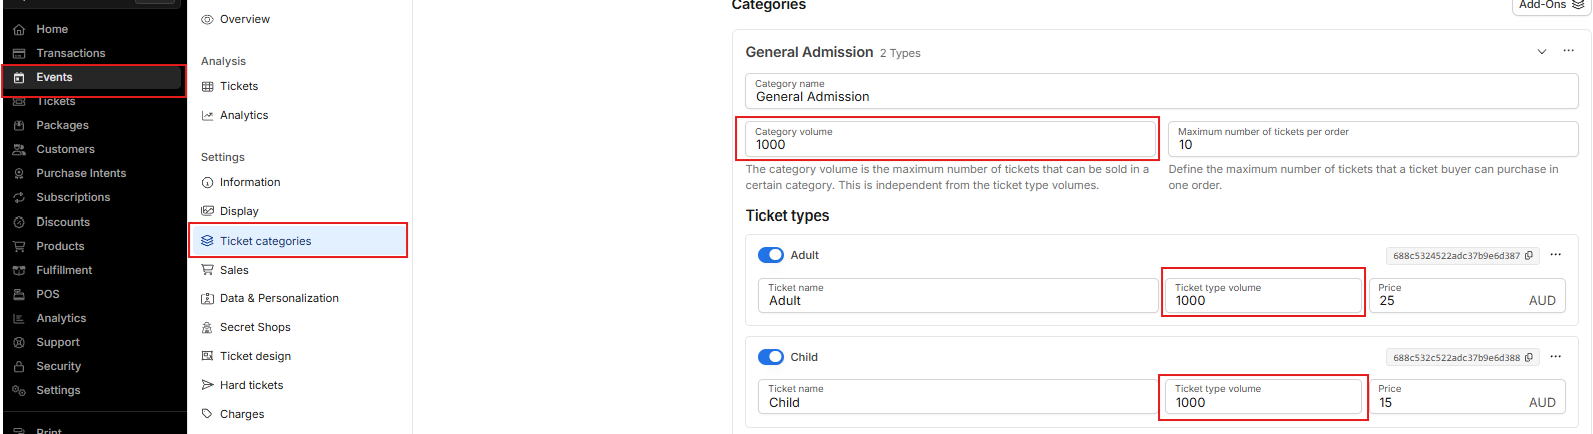
It’s important to review ticket volumes at Event level, Category level, and Ticket Type level - especially if you have strict or limited ticket allocations in place. If your event has restricted ticket limits, you must also check:
- Event Level - The maximum ticket volume is the limit of tickets that can be sold in total. This is independent of the volumes of the single tickets types and categories.

- Category & Ticket Type Volume
We recommend reviewing all three levels to ensure tickets are not unintentionally selling out due to a lower limit set within a specific category or ticket type.
Test Scanning & Guest Lists
- Before event day, log in and complete a quick test scan to ensure everything is working as expected, and if you require a printed guest list, please refer to our related help articles.
Internet & Power
- Make sure you have reliable internet for your POS and/or scanners to operate on the day and as a tip, consider bringing backup power packs to keep devices charged throughout the event.