How do I collect customer dietary requirements?
Introduction
Use this guide to set up ticket or seat-specific data fields — such as dietary requirements, allergies, or accessibility needs.
The key rule
If you need your data matched to a specific ticket, seat, or named ticket holder, you must collect it at the ticket level — not the transaction level.
Before you go on sale — if you're unsure which data level suits your reporting needs, talk to your Account Manager first.
Summary
How it works by Event type?

Do you also require each ticket to be personalised ('named')?
In both cases above, the corresponding name will be the name entered at checkout at the transaction level. Optionally, you can require each ticket to be indiviudally personalised (named). This ensures an additional layer of data is captured and each individual ticket holder is reported against the additional field.
Toggle on All ticket types require personalisation if this is required for your event.
Note: By default, the ticket will be issued; however, the customer placing the order will be required to name each ticket individually and complete the additional data field for each ticket before the ticket becomes valid
Help guide
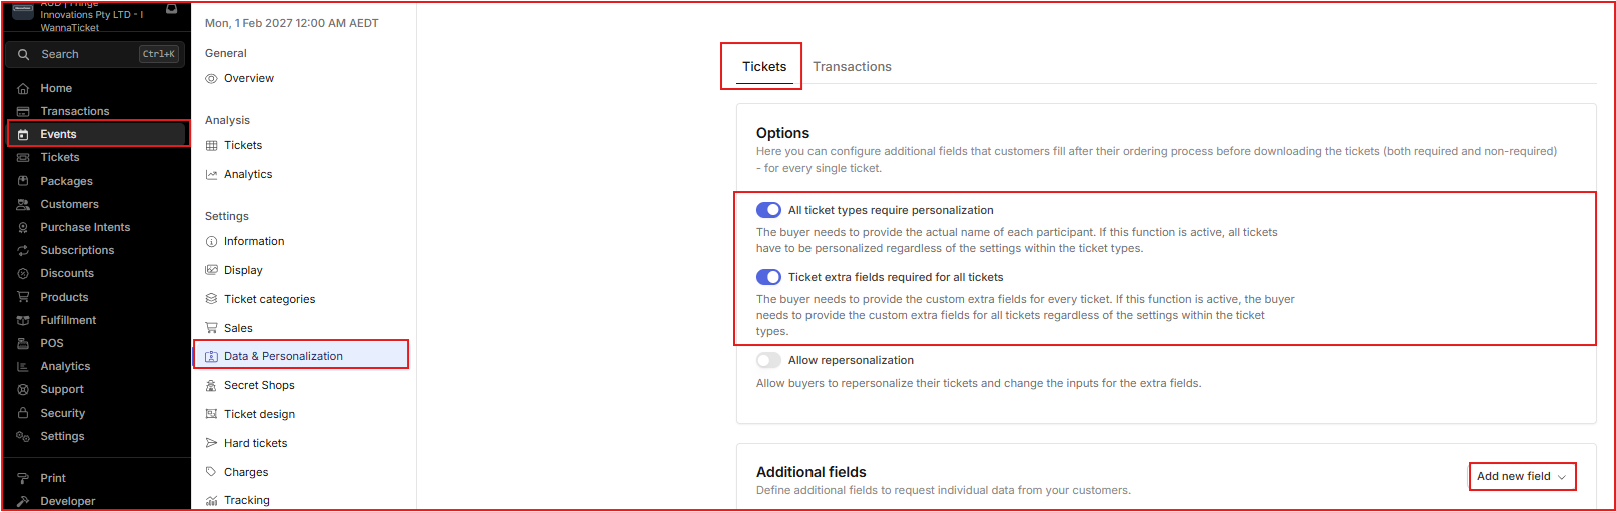
- Via the Account menu, navigate to the Events module and open your Event from the list
- Via the Event menu, click on Data & Personalisation
- At the top of the page, you can toggle between Tickets and Transactions. It’s very important to ensure you are working under the Tickets tab.
- Optionally toggle on All ticket types require personalisation (optional, only if required)
- You must enable the option Request ticket extra fields for all tickets (toggle ON)
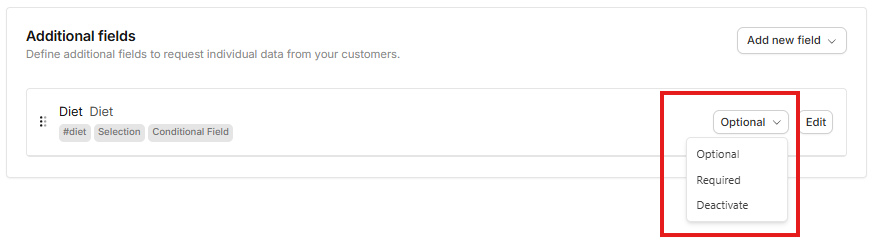
- Under Additional fields, you may already see some existing checkout fields that have previously been used on your account. If you want to use an existing checkout field, you can simply click Activate and then choose whether the field is Optional or Required from the dropdown list.
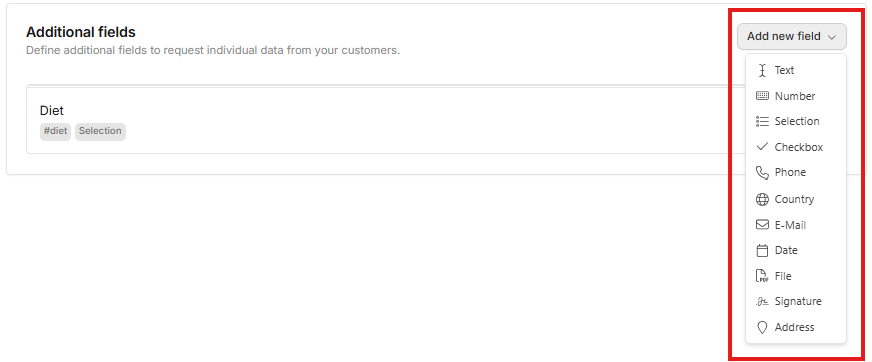
- To create a brand new Additional field, click Add new field and choose the required format from the dropdown list. Example: you could choose Text to allow customers to enter free-text responses, or choose Selection to create a predetermined pick list
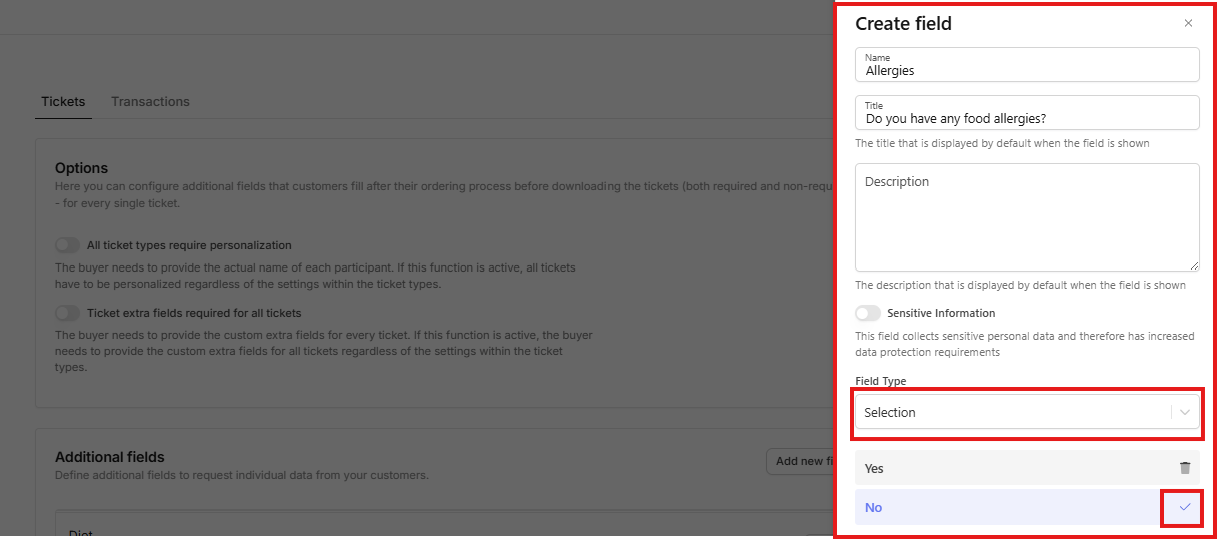
- A pop-out menu will appear on the right and complete the fields as required (Tip: If your field type is Selection, make sure to click the blue tick after adding each line item)
- Ensure you click Save before closing this pop out window
- The new additional field will be available for use under both the Tickets or Transactions tab. So ensure you are still working under the Tickets tab.
- Click Activate and then and then choose whether the field is Optional or Required from the dropdown list
- Click Save on the top right corner before existing
