How can I save a custom filter in the Tickets module for future use?
Introduction
You may want to create a saved filter to quickly reference a list of ticket holders, with your preferred data fields toggled on or off.
Summary
By default, the Tickets module displays data at the account level. You can filter it by event and further refine it using granular data points. Contact your Account Manager for guidance if needed.
Helpguide
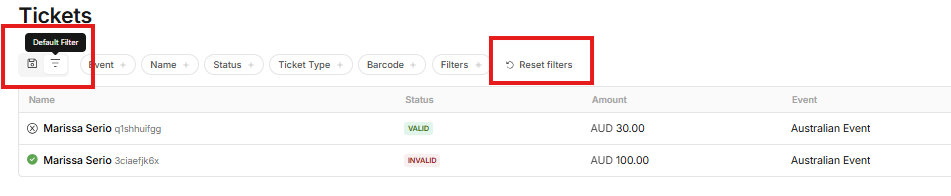
- Via the Account menu, navigate to the Tickets module
- If you already have other saved filters, toggle to the default filter to begin a new list
- Before you begin, it’s very important that you click Reset Filters (if displayed). This will refresh the default settings before creating a new saved filter.


- The default status filter will include Tickets with the following status
- Valid - Valid ticket holder, personalisation complete (if required), ticket ready to be scanned
- Reserved - This includes any tickets in reserve, which may be pending payment via purchase intent or reserved if you have enabled reservations for your event.
- Details required - The ticket holder has not yet completed the required personalisation. You may wish to contact these ticket buyers prior to the event. Until the required personalisation is complete, the ticket cannot be scanned.
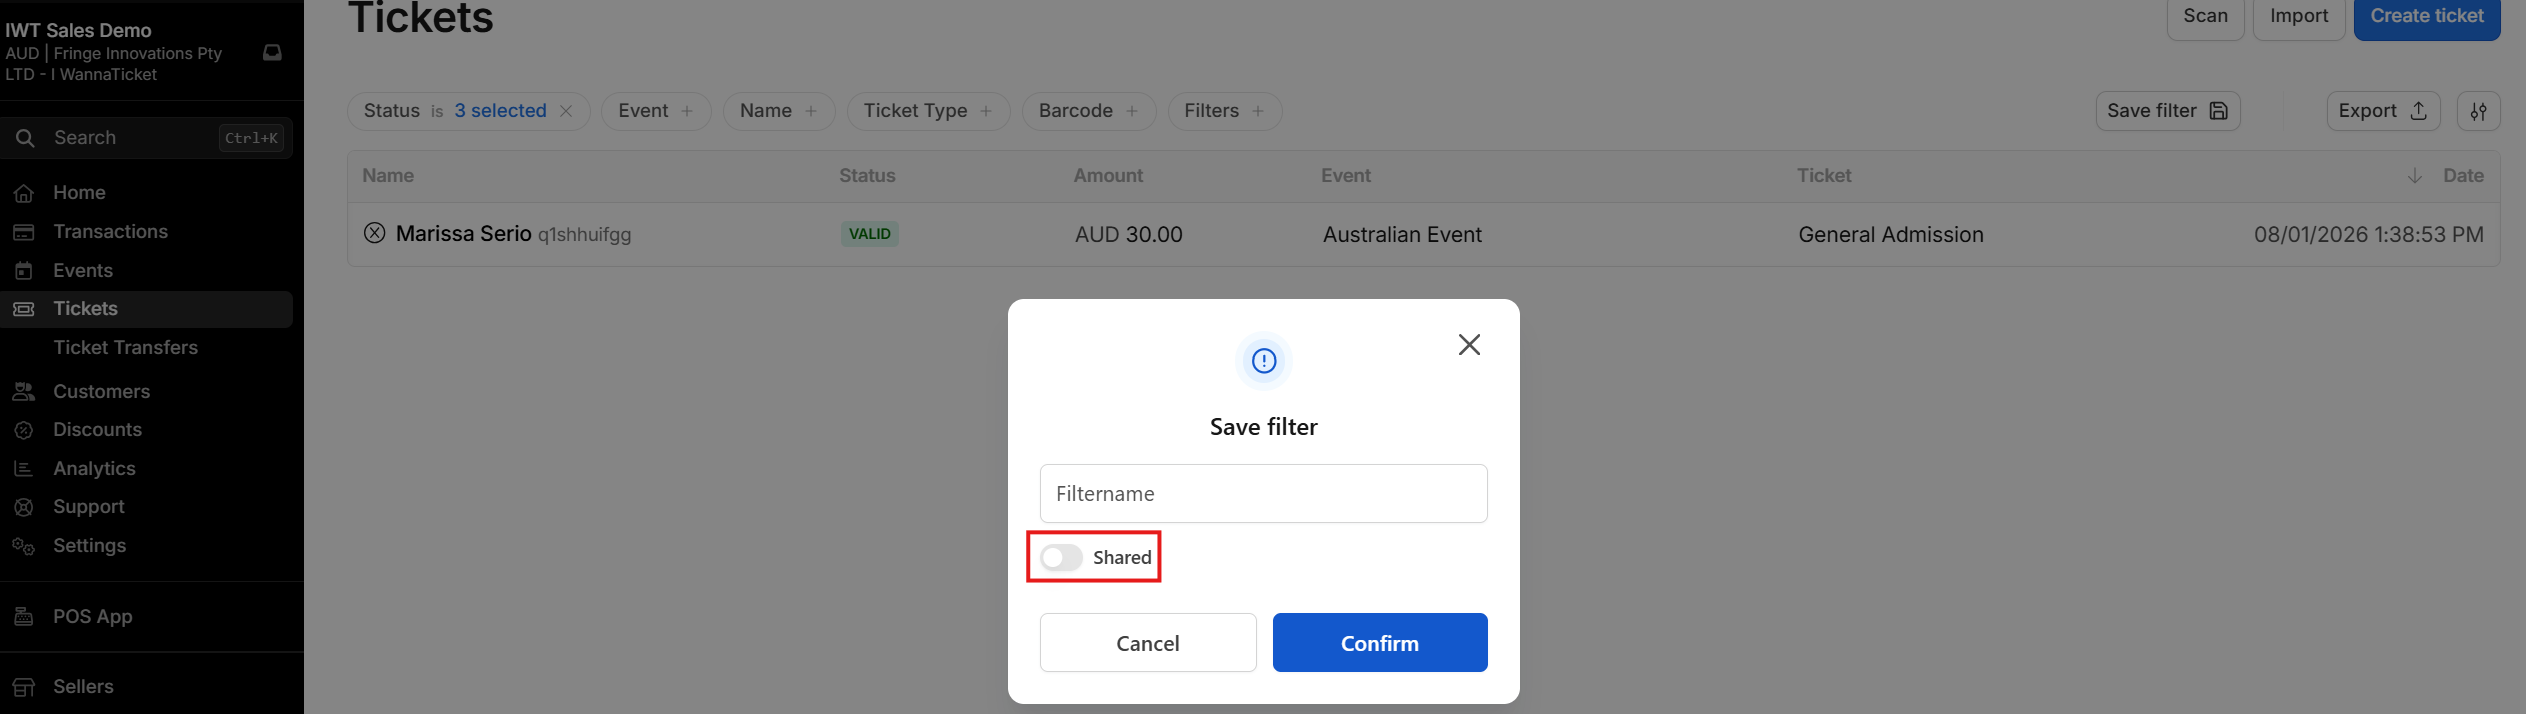
- Use the filters in the top menu to create your desired list (for example, by selecting a specific event or ticket type).
- Check your filters are correct
- Click Save Filter, which will prompt you to name the filter view and optionally allow you to toggle whether this filter view should be shared with other users in your account

- Once saved, the top menu, will now display a new filter. This allows you to toggle between saved filters and the default filters.
- When you toggle back to the default filter, it’s very important that you click Reset Filters (if displayed). This will refresh the default settings before creating a new saved filter.